Changing Differential Fluid
This project should only take 30-45 minutes once you get used to the technique. Follow along in the easy steps below and you should be just fine. This writeup is based off of a Dana 30 differential, but it applies to almost any differential.
The axle/differential (diff) fluid is probably one of the most frequently abandoned fluids on vehicles. The diff fluid has to keep the ring gear, pinion gears, and axle bearings lubricated and cooled; trust me they get very hot while under load for long roadtrips. Over time the diff fluid (gear oil) breaks down and cannot bear the same forces like new oil can. I try to change my diff fluid in my rear axle at least every 15,000 miles and around 30,000 on the front axle since it is only under load during the occasional 4×4 trip. If you tow with your vehicle or race it, I recommend changing the fluid more frequently.
I strictly use synthetic lubricants in my automobiles; my axles are no exception. I use Redline 75w90 front and rear. If you have open diffs (no limited slip, posi, locker, traction device) then you could use the 75w90NS (non slip), but gear oil with a friction modifier does just fine too. The regular Redline oil has a friction modifier already added to it to make sure that your limited slip (trac-loc) functions like it is supposed to. Without the friction modifier, the trac-loc will act more like a locker and behave poorly on the street making clunking noises when you turn.
Tool/Supply List
- SAFETY GLASSES!
- Shop Light or Flashlight
- A tube of Permatex RTV gasket making silicone.
- Spray degreaser/solvent (I use carburetor cleaner or kerosene)
- The proper amount of GL-5 rated gear oil for your axle. See also TJ Fluid Type/Capacities
- Waste oil catch pan
- Various length socket extensions
- 1/2" Socket
- Socket wrench
- Gasket Scraper
- Torque wrench
- Rubber mallet, dead-blow hammer
- Pump, funnel & hose, or other means of putting new fluid into the diff, shop towels
The Replacement
Step 1
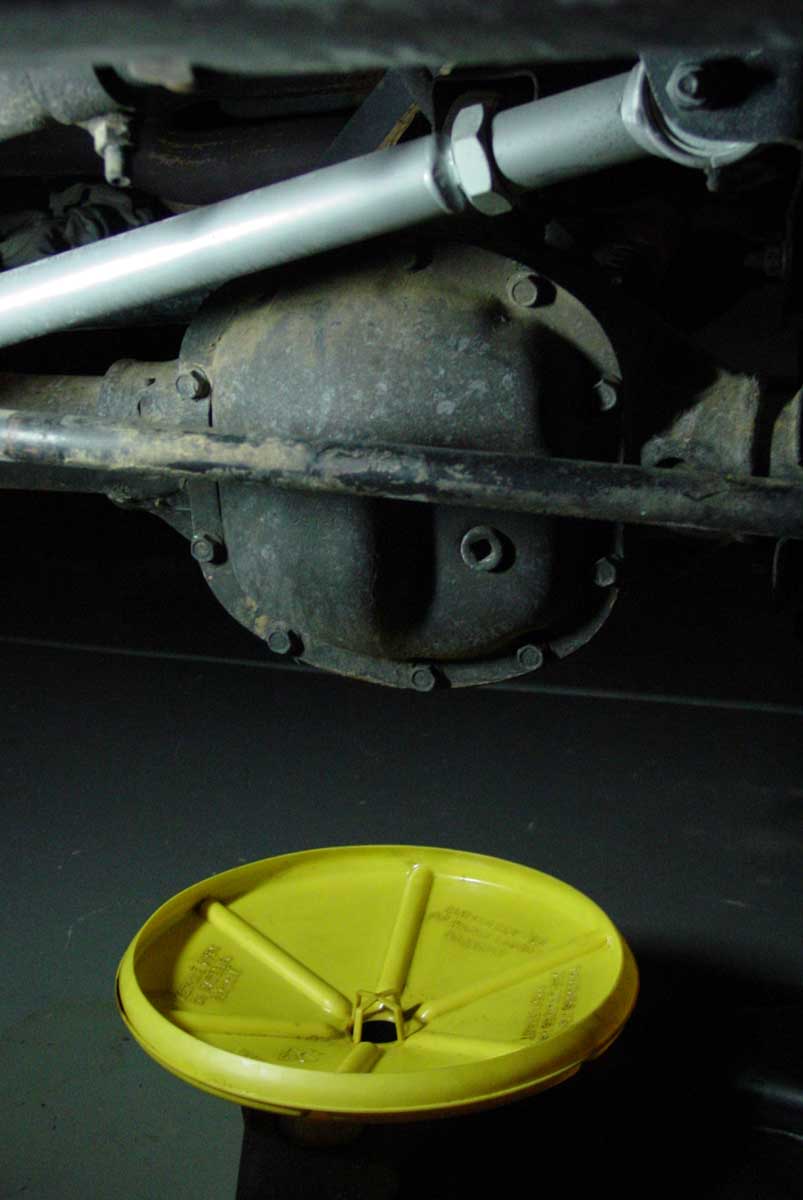 First, get out the shop light and gather your tools from the list above. Crawl under vehicle so you can get to the differential. For those of you reading this with stock height Jeeps or any car you may need to chock your tires and jack up the vehicle (use jack stands for safety) in order to get the differential to droop enough so that you can get to the differential. For instance, a stock height Wrangler will have the rear diff covered by the gas tank making this fluid change nearly impossible without jacking the Jeep up. Get the drain pan ready.
Step 2
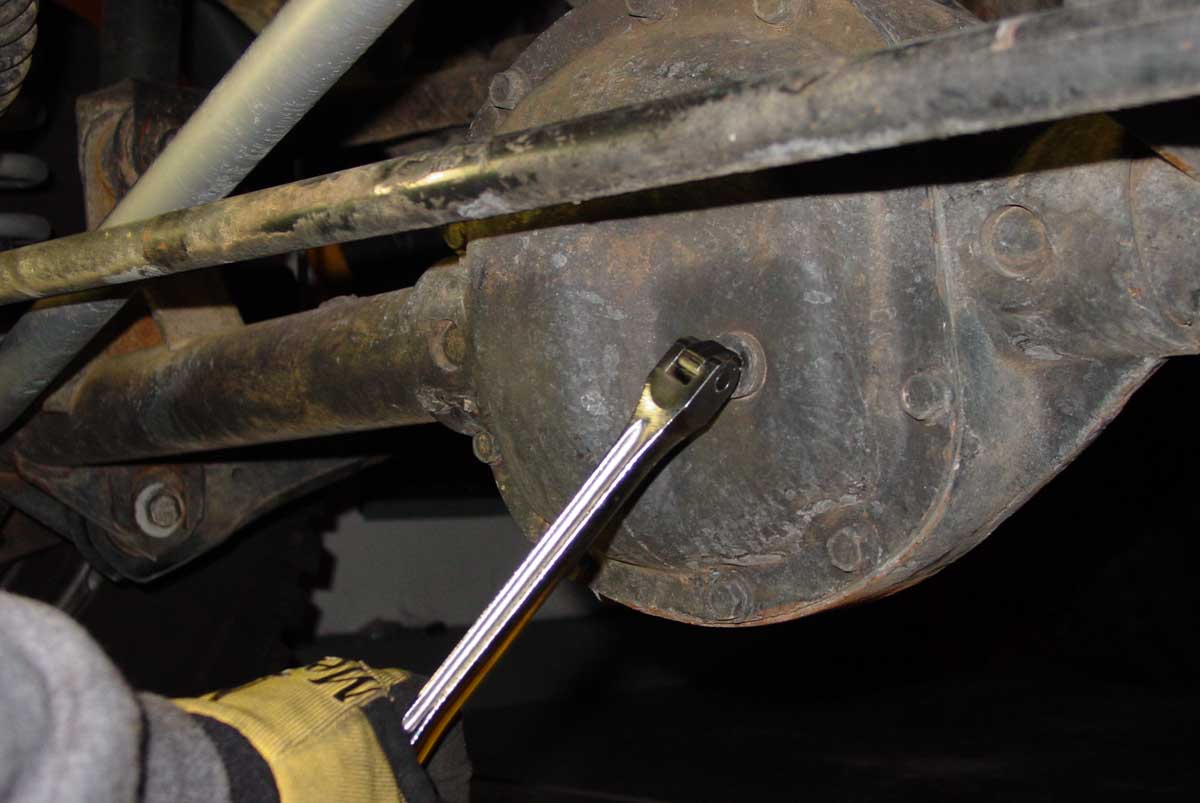 This sounds stupid, but trust me I have seen things go wrong. Before you drain the axle, loosen the fill plug first. I have seen rusted old diff covers where you couldn't get the fill plug out. If you can't get the plug out and you drain the fluid before you find this out, you have no way of refilling your diff until you go buy a new diff cover. On most Jeeps you just use the 3/8" square bit on your 3/8" ratchet wrench. I use a 3/8" breaker bar for more torque. Some vehicles just have a rubber or plastic plug that you can pop out. Loosen but don't remove the plug for now.
Step 3
Now use your 1/2" socket and remove all of the bolts except for the very top bolt. You will need to loosen the top bolt about half way (middle photo). This is done so that when you move the cover several quarts of diff fluid don't all come rushing out at once. This is where you need to get your dead-blow hammer and give the diff cover a little thwock to the side. The silicone gasket that is in there kind of holds the diff cover on there and the blow from the hammer will break the grip of the silicone and let the fluid drain out (far right photo).

Step 4
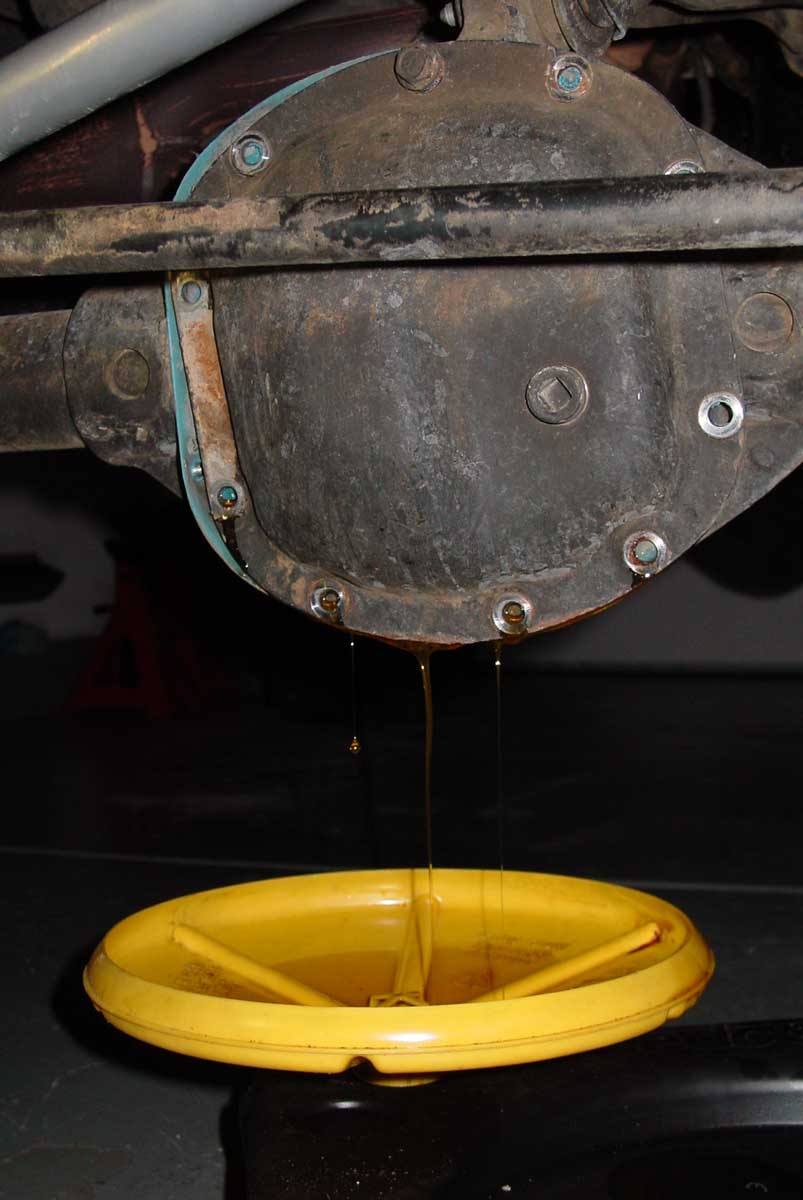 Let the diff fluid drain. Once the flow begins to slow down, remove the top bolt and take the diff cover off and set it aside for a moment. Get your spray degreaser/solvent and spray a little all over the gears and the inside of the diff case and let it soak. This will help dissolve any grime and deposits while you complete Step 5. I like to use kerosene, because it degreases pretty well and it still acts as a lubricant and will not break down rubber seals like solvents tend to do. Carburetor cleaner or brake cleaner will work also; they are just a little harsher than kerosene.
Step 5
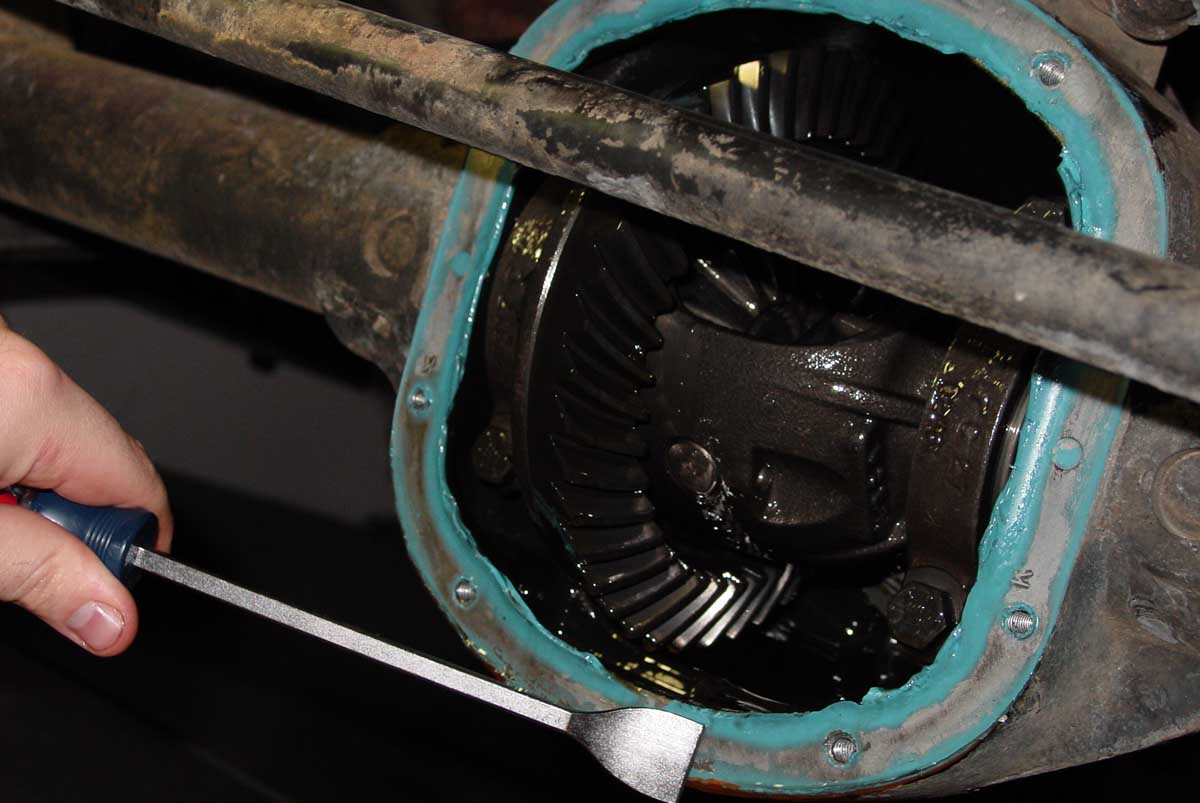 Get the gasket scraper and scrape all remnants of the gasket material off of the diff case and cover. Be careful not to gouge the metal of the case or cover. A gouge can cause a poor seal in the future, leading to fluid leakage down the road. Make sure to try to keep as many of the scraped gasket pieces as possible off of the gears.
Step 6
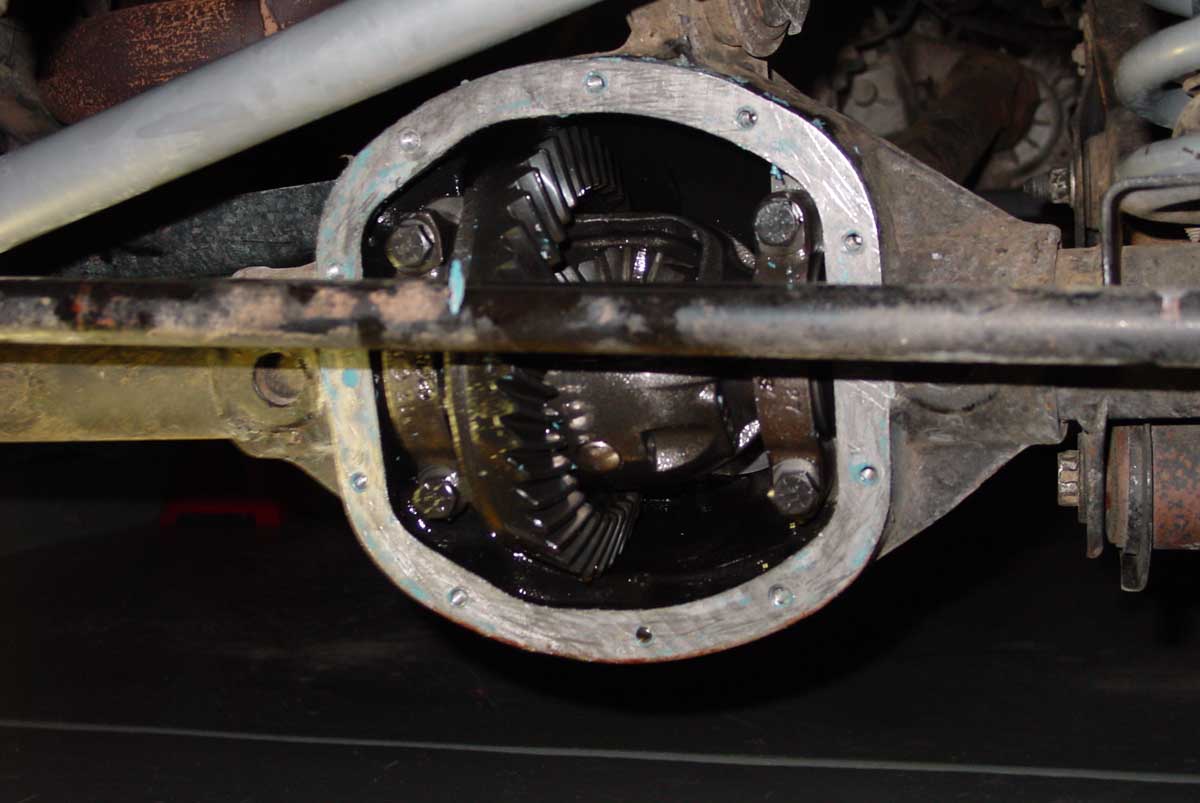 Now that you have the gasket surfaces clean and the fluid drained, get the degreaser/solvent and really soak everything in the case. Get into the nooks and make sure to hose out all of the tiny bits of gasket that you couldn't get out by hand. Once you get it real clean, get some clean shop towels and pat things dry to get as much degreaser/solvent out of there. Also get it all out of the bottom of the diff case, where it tends to puddle; solvent/degreaser in the case will prevent the new gear oil from lubricating as well as it could.
Step 7
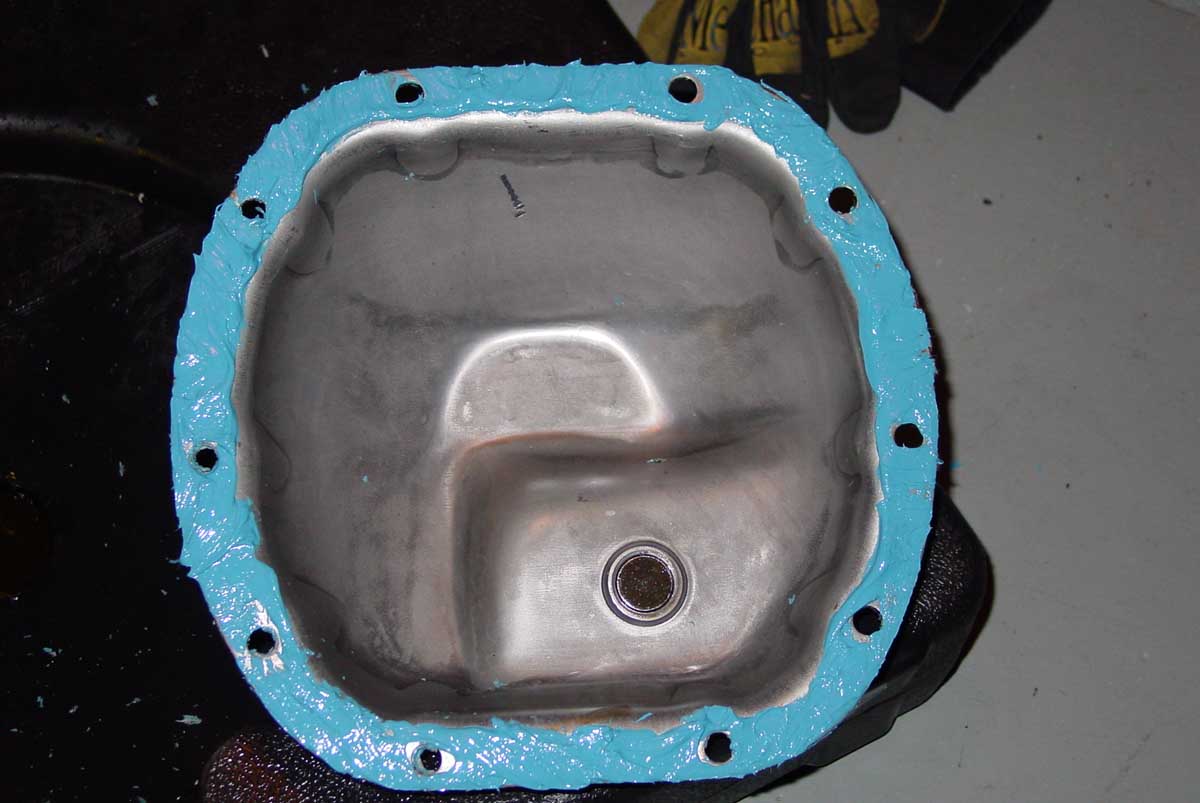 Get out the Permatex RTV to make the new gasket. I use the blue type, but any Permatex that is resilient to at least 500�F will work. The Jeep manual says to put a 1/4" bead around the inner rim of the cover, but I have found that sometimes that leads to leaking. As seen at right, I smear a thin layer (1/16" to 1/8" thick) of silicone all around the diff cover to make sure it gets a good seal. It doesn't really use much more silicone than the official Jeep way, and you are almost guaranteed to get a perfect seal every time. Once the gasket is placed on the cover properly, let it sit for 10-15 minutes (follow instructions on tube) to allow the silicone to partially setup and get tacky.
Step 8
Now that the gasket is slightly tacky, carefully put the cover back on and put the cover bolts back in finger tight. Take your socket wrench and tighten the bolts until they barely snug up to the case. Get the torque wrench and tighten each bolt to 30 foot-pounds. This is the torque specification for all Dana brand diff cover bolts. Wipe off excess silicone that squeezed out and you are now ready to remove the fill plug and get ready to fill. Wait about 15-30 minutes before filling to allow the gasket to dry.
Step 9
Fill the diff with the appropriate type and quantity of approved gear oil for your vehicle. I use a 1/2" diameter, 3 foot hose attached to a funnel to pour the oil in. It is kind of messy, there are pumps and squeeze bottles you can use as well - it's not rocket science. Fill the diff until you have poured in the correct amount even though it will try to leak back out of the fill hole as if it were overfilled. Since m y pinion is rotated about 30 degrees, I REALLY overfill the diff because the hole is much lower than stock but I am still putting in the correct amount of fluid. Once filled, quickly put the fill plug/bolt in and tighten it to 25 ft lbs. You are now done! If you have limited slip (trac-loc) when you do a test drive go to a parking lot and do about 6-10 tight figure eights. This will cause the clutches in the limited slip to pump clean gear oil in between and get the friction modifiers where they need to be for the unit to function properly.
Page created on 5/26/2004
Last updated on 5/28/2004