4.0L Serpentine Belt Replacement
Please note: This writeup was completed on my 2001 Jeep TJ with a 4.0L I-6 engine, and it also worked on my 1998 Monte Carlo Z34 with a 3.8L V6 (it should also apply to Cherokees, Grand Cherokees and Wranglers with the 4.0L). Although engine layout/design will vary amongst auto-manufacturers, the basic ideas and principles in this writeup should apply to many vehicles with a serpentine belt system.
Every 30,000 miles I replace the serpentine belt in my vehicles whether they look like they need it or not. A serpentine belt is an inexpensive way to make sure that you won't get stranded from a broken, rotten, old serpentine belt. With age, your rubber serpentine belt will begin to crack and dry-rot, and could possibly break at the worst possible place. This belt is also known as the "accessory belt" or "fan belt" and it is a way to transfer power from the rotating crankshaft to drive necessities/accessories such as:
- Alternator (for charging the battery and keeping your electrical system running)
- Water pump and cooling fan (for vehicles not equipped with an electric cooling fan)
- Power steering pump (to give you power-assisted steering if you have it)
- Air Conditioning (AC)
- smog pump (air pump)
- supercharger
On most vehicles that are driven regularly, belt replacement every 30,000 miles is almost TOO frequent. To find out how to check and see if your belt is needing replaced or not, check my belt inspection writeup. When I replace my belt, assuming the old one isn't totally trashed, I put the old one in my trail box just in case a buddy (or heaven forbid ME) needs a spare belt.
This project should take 30 minutes or less, even for the beginning mechanic. Follow along in the easy steps below and you should be just fine.
Addtional notes worth reading:
I have had numerous reports from readers that in 2002 Jeep changed the belt-tensioner square hole size to 1/2". So, you may need a 3/8" or a 1/2" breaker-bar depending on what year your vehicle is.
Tool/Supply List
- SAFETY GLASSES!
- 1 Serpentine Belt (I use Goodyear Gatorback P/N 4060882)
- 3/8"-drive or 1/2"-drive Breaker-bar/Socket Wrench
- Shop Light or Flashlight
Step 1
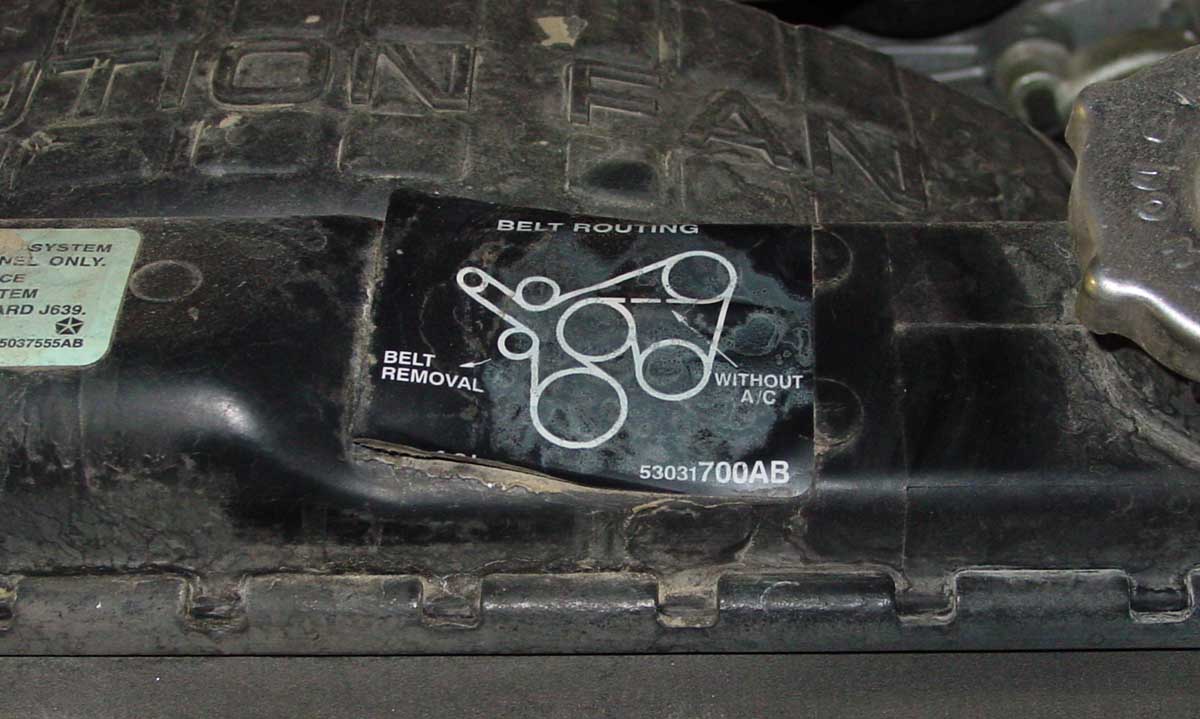
First, open the hood, get out the shop light and 3/8"-drive breaker-bar/socket-wrench. I suggest using a breaker-bar if you own one; I completely destroyed [read: exploded] a socket wrench doing this one time...the pressure required sometimes is more than what a socket wrench is designed to withstand. Now, locate your "Belt Routing" diagram, which is a decal that should be affixed to the top of the radiator or on the sheet metal under the hood somewhere quite visible.
Step 2
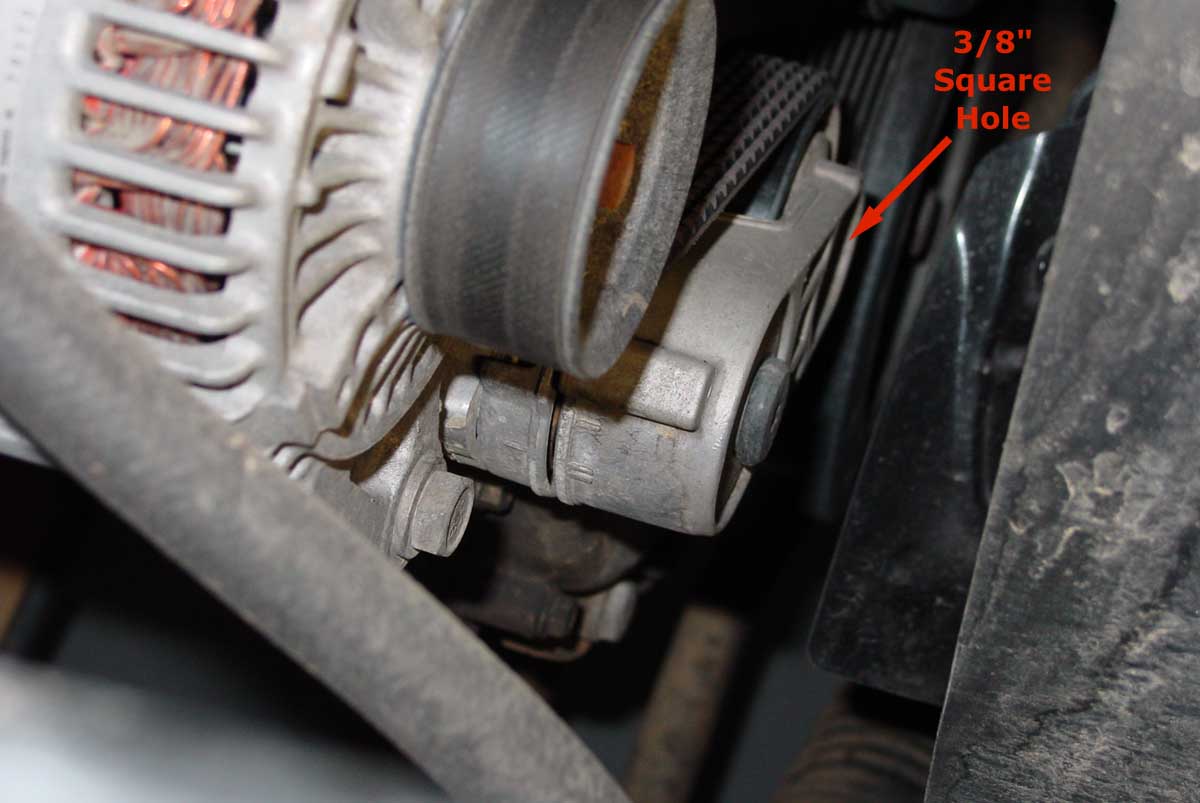
After finding the routing decal, locate belt tensioner. In the picture below, the red arrow is pointing to the belt tensioner's 3/8" square hole for your breaker bar. That silver, oval-shaped metal arm is the tensioner.
Step 3
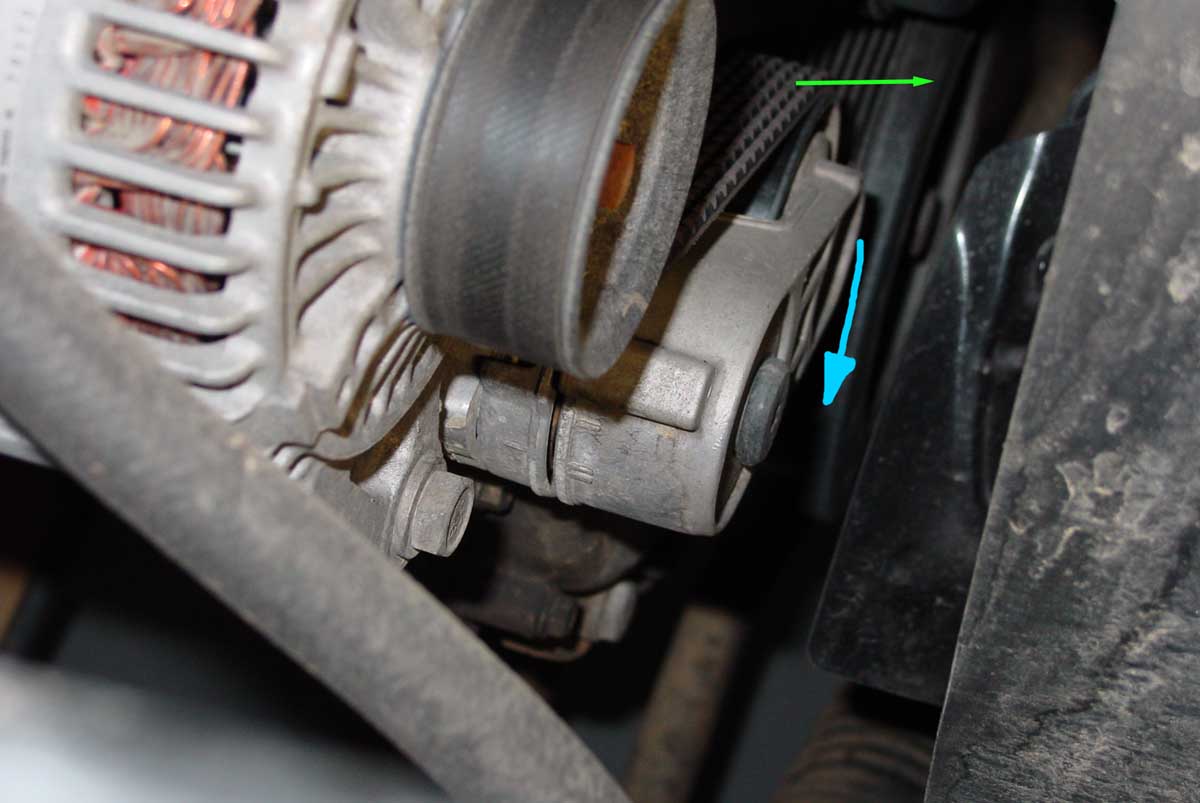
Now, insert your wrench/bar in the hole pictured in step two. As you are standing at the front of your Jeep facing to the rear, you want to use your wrench/bar to rotate the belt-tensioner arm clockwise (depicted by blue arrow below); this will be towards the ground in most cases. This removes the tension from the belt. While the tension is removed from the belt, pull the belt towards the front of the vehicle (shown by green arrow below) and slip it off of the tensioner. If you have difficulty slipping the belt off of the tensioner, try to slide it off of one of the many other pulleys instead.
Step 4
Now you can release pressure on the tensioner. This step involves completely removing old belt. For my TJ, it involved getting under the Jeep to detangle everything off of the BIG crankshaft pulley and to route then belt around the fan blades.
Step 5
Now that the old belt is off, get out the new belt and put it back on in the reverse way that you took it off, pretty simple! Once you have it put back together, clean up your tools and start your Jeep and listen for any new strange sounds (like a belt slipping or rubbing). Note that a Gatorback belt makes a zippy, whirring sound; don't confuse this with a REAL problem. Close the hood, you're now done.
Page created on 7/14/2003
Last updated on 3/3/2005